Installing and Managing Apps
Before an app can be installed, it must be registered.
Installing an App
To install a PDP app, begin by navigating to Settings > Apps > Manage apps. Here, you can see both the apps that have been installed, as well as apps that are available for install. For this guide, we will be installing the “Crostini” app.
- To install the app, hover over the app you wish to install. A menu icon will appear at the right side of the row. Click on it and select the Install option.
- A modal will appear, displaying the permissions the app will require in order to operate, if the app requires data access. You must give the app explicit authorization for all requested permissions in order to use it.
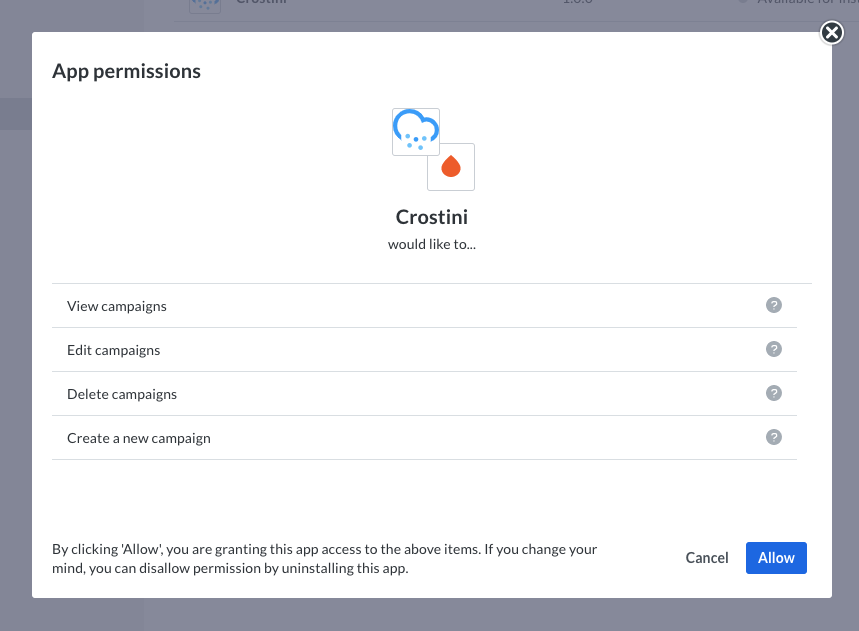
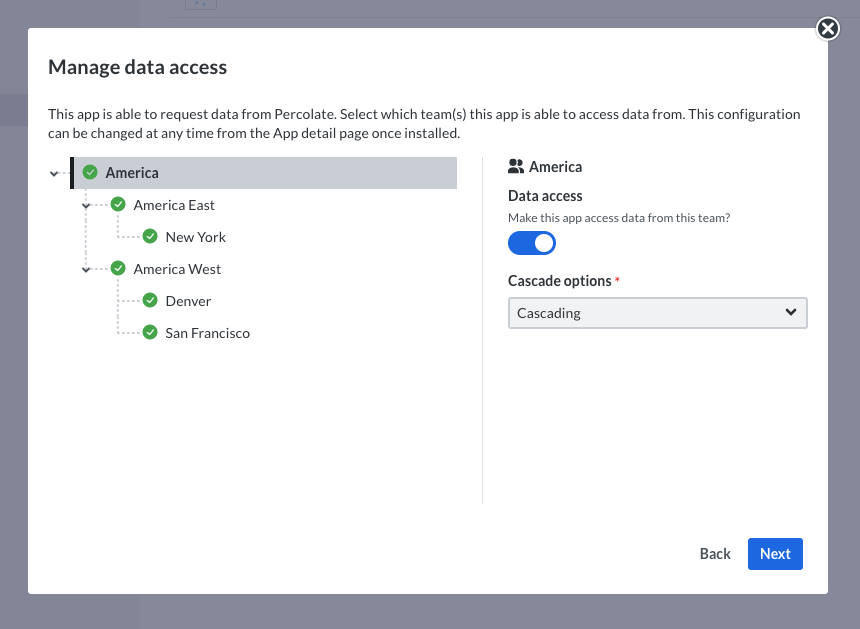
- Once you have authorized the app to access the specific types of data it requires, you will be asked which scopes (teams) should have access to this app. This could be your entire organization, or a set of specific teams. For each scope selection, you can choose whether or not the app may have access to its child scopes as well using the Cascade option dropdown menu.
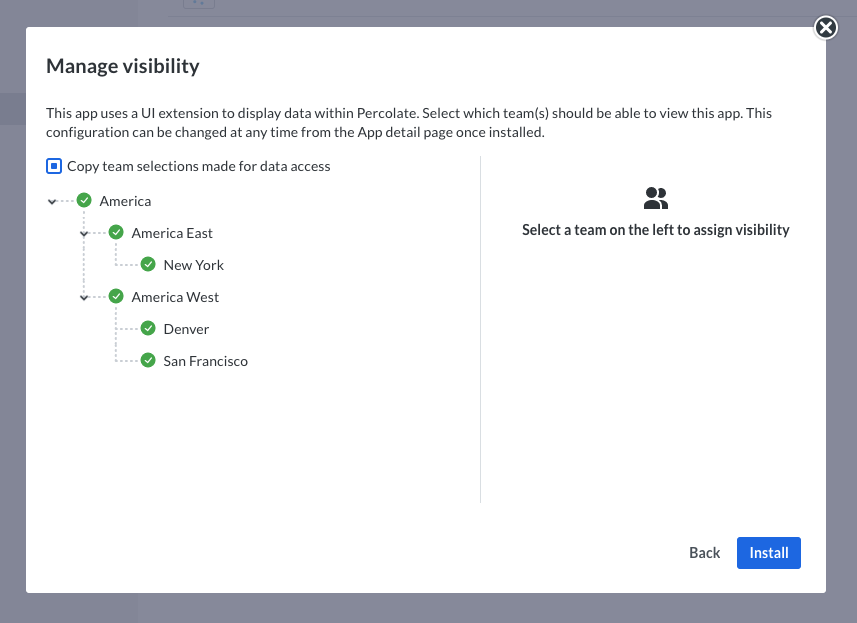
- If the app has UI components, you will be prompted to select another set of scopes that you wish the UI components to appear in. This set of scopes can be copied from the data access list using the Copy team selections made for data access checkbox.
- Click the Install button to install the app. The app is then notified that it has now been installed to your organization. At this point, it may create, read, update, or delete data within the confines of the selected scopes and requested permissions in order to finalize the installation. It will do this through an artificial user created as part of the installation, which will have the name
<name of app>Bot. You may see this user taking actions (via API calls using an access token provided to the app upon installation) within your organization while the app is installed.
The installation process can take considerable time if the app needs to make many API requests. If the app is unable to do the setup required, the installation will fail with an error message, and the app will remain in the state Available for installation.
Please reach out to [email protected] if you experience issues installing an app.
Managing an App
The app has now been installed, but not yet activated. In the Manage apps list, its status will now appear as "Inactive". In order to begin using its UI components, the app must be activated. This can be done using the Activate option in the dropdown menu.
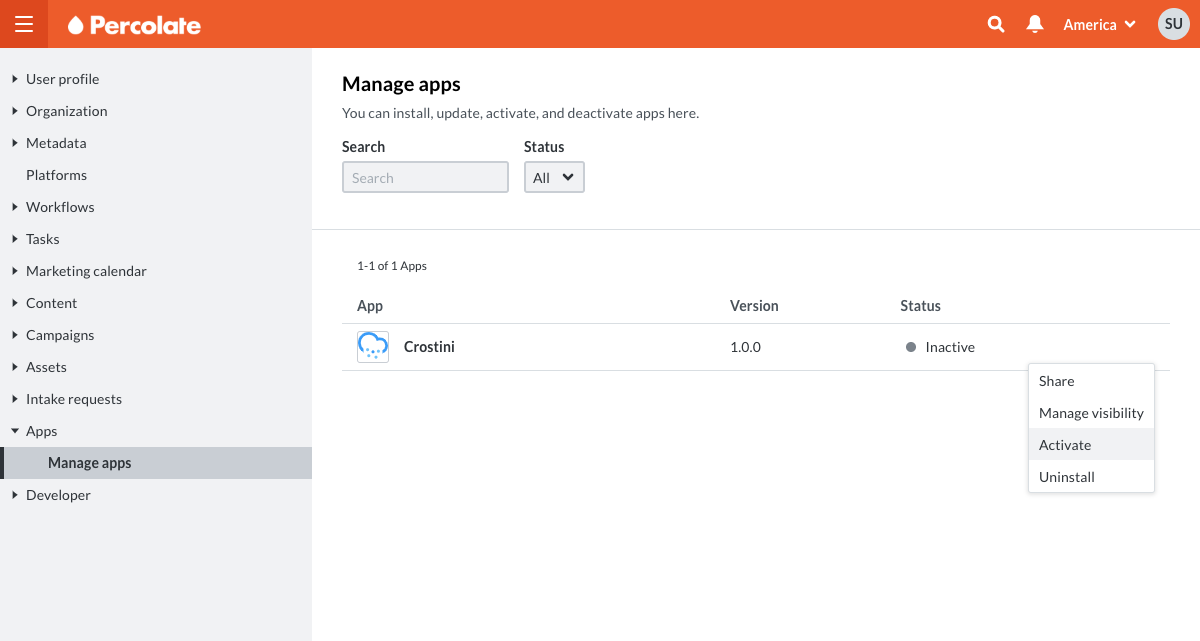
Once you confirm activation of the app, you may begin using its UI components. The sections of the Percolate application where these UI components may appear are:
- Campaigns
- Content
- Assets
- Requests
- Tasks
- The top navigation bar
- The app settings configuration page
For these first five sections, the app will appear as a new tab in the section.
An app's UI component in the top navigation bar is reachable using the icon that appears in the main menu dropdown, which will take you to a full-page UI component.
Finally, an app can present a UI component where its settings can be configured. If it has one, this component can be accessed by clicking on the app in the Manage apps list, and selecting the rightmost tab.
You can also view details about the app, such as its description, the installed version, the permissions that it requires, or the support website under the Details tab. You can update the data access or visibility scopes using the Data Access and Visibility tabs. The app can also be deactivated using the Deactivate button in the upper right hand corner of the page. Once the app is deactivated, this becomes an Activate button.
Upon updating the data access or activating/deactivating the app, it will be notified so it may update its own state and make any API calls required. If the app reports that it was unable to successfully make all the required updates, the state of the installation will not change.
Upgrading an App
After your app is installed, the developer may upload a new version of the app. If this happens, the app will continue to function, but you may not have access to its updated functionality. If an upgrade is available, the status of the app will have “upgrade required” appended to it. To upgrade, select the Upgrade menu item.
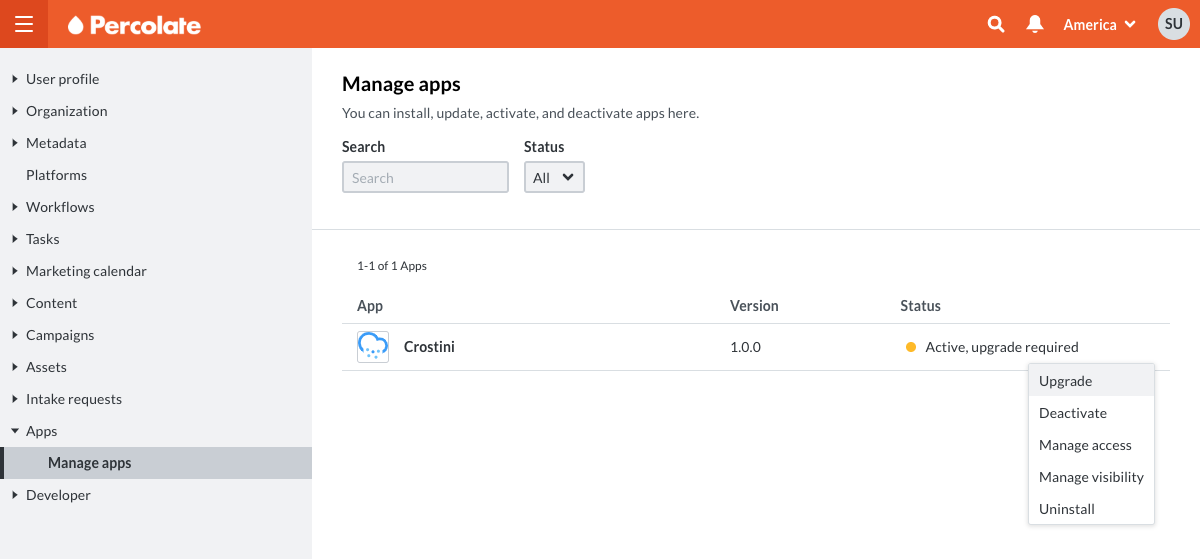
The new version of the app may have a different set of permissions required. You will be prompted to reauthorize the requested permissions before upgrading.
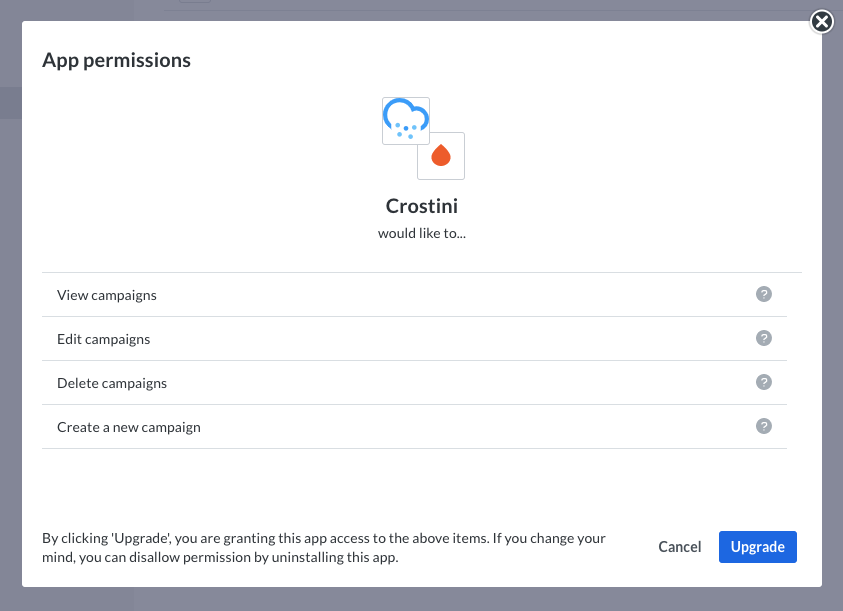
Once you click Upgrade, the upgrade process begins. If it completes successfully, your installation will be using the newest version of the app, otherwise the version will remain unchanged.
Uninstalling an App
If you would like to uninstall the app, you can use the Uninstall button in the upper right corner of the page next to the activate/deactivate button in the app management page. You can also use the dropdown menu in the Manage apps list view. Uninstalling an app will revoke its access to your data. Once the app has been uninstalled, its status in the Manage apps page will return to "Available for installation".
Updated almost 6 years ago
