Running an App Server
Percolate apps allow you to extend the Percolate platform and add custom functionality to it. When live, your app will need to have certain HTTP endpoints and be deployed on a backend server. Percolate provides a demo application that you can use as a reference when starting out. We’ll set up and run it in this guide using the following steps:
- Installing ngrok, which allows us to expose a locally running process to the internet.
- Cloning and running Percolate’s Biscotti app.
- Register and install the app on Percolate, and test its lifecycle callbacks.
- Set up and test its UI extensions.
ngrok allows you to make apps running on your local machine available over the internet. This allows rapid development of your application since the more challenging alternative would be to deploy the application to a cloud-hosted server each time you make a change.
Installing ngrok
- Download the ngrok binary for your operating system from the ngrok website: https://ngrok.com/download.
- Unzip the file. For MacOS and Linux, the command to run on the terminal would be:
$ unzip /path/to/ngrok.zip
For Windows, double clicking the zip file from the file explorer should unzip it.
- The ngrok binary should be ready to use now and can be accessed using /path/to/ngrok. The following lets us know that ngrok is working:
$ /path/to/ngrok -v
ngrok version 2.3.35
- You can add this binary to a directory in your $PATH environment variable so you can use the command ngrok without specifying the entire path:
$ cp /path/to/ngrok /usr/local/bin
$ ngrok -v
ngrok version 2.3.35
Setting up and running the hello world app
We will use the Percolate Biscotti app for our backend. It is a simple Python web app that exposes several endpoints that are required in the app definition when you register it on Percolate. For example, the /install endpoint is called when the application is installed. The app requires Python 3.5 or above.
To get started:
- Clone the app and change directory to the repo:
$ git clone https://github.com/percolate/biscotti
$ cd biscotti
- Create and activate a Python 3 virtual environment:
$ python3 -m venv venv
$ source venv/bin/activate
- Install the required packages for the app:
$ pip install -r requirements.txt
- Finally, we’ll run the server:
$ python app.py
It should start running on your local host 127.0.0.1 at port 8000.

To test it out, make a request to the app using curl. We’ll get the following response if everything is setup correctly:
$ curl http://127.0.0.1:8000/
hi
Since the server is running locally now, let’s expose it to the internet using ngrok. In a separate terminal window, run:
$ ngrok http 8000
This exposes the app that’s running on port 8000 to the internet.

Now, whenever a request is made to the URL ngrok has given us, https://494366fd.ngrok.io/, ngrok will relay that request to the locally running server. Test this by making a request to the URL using curl:
$ curl https://494366fd.ngrok.io/
hi
The response is the same as before, however this time it was routed to ngrok’s servers first before being rerouted to our locally running server. We can see a log of the request on the window where ngrok is running:

Now that the app is running and exposed to the internet, we’re ready to register the app on Percolate.
Registering and installing the app on Percolate
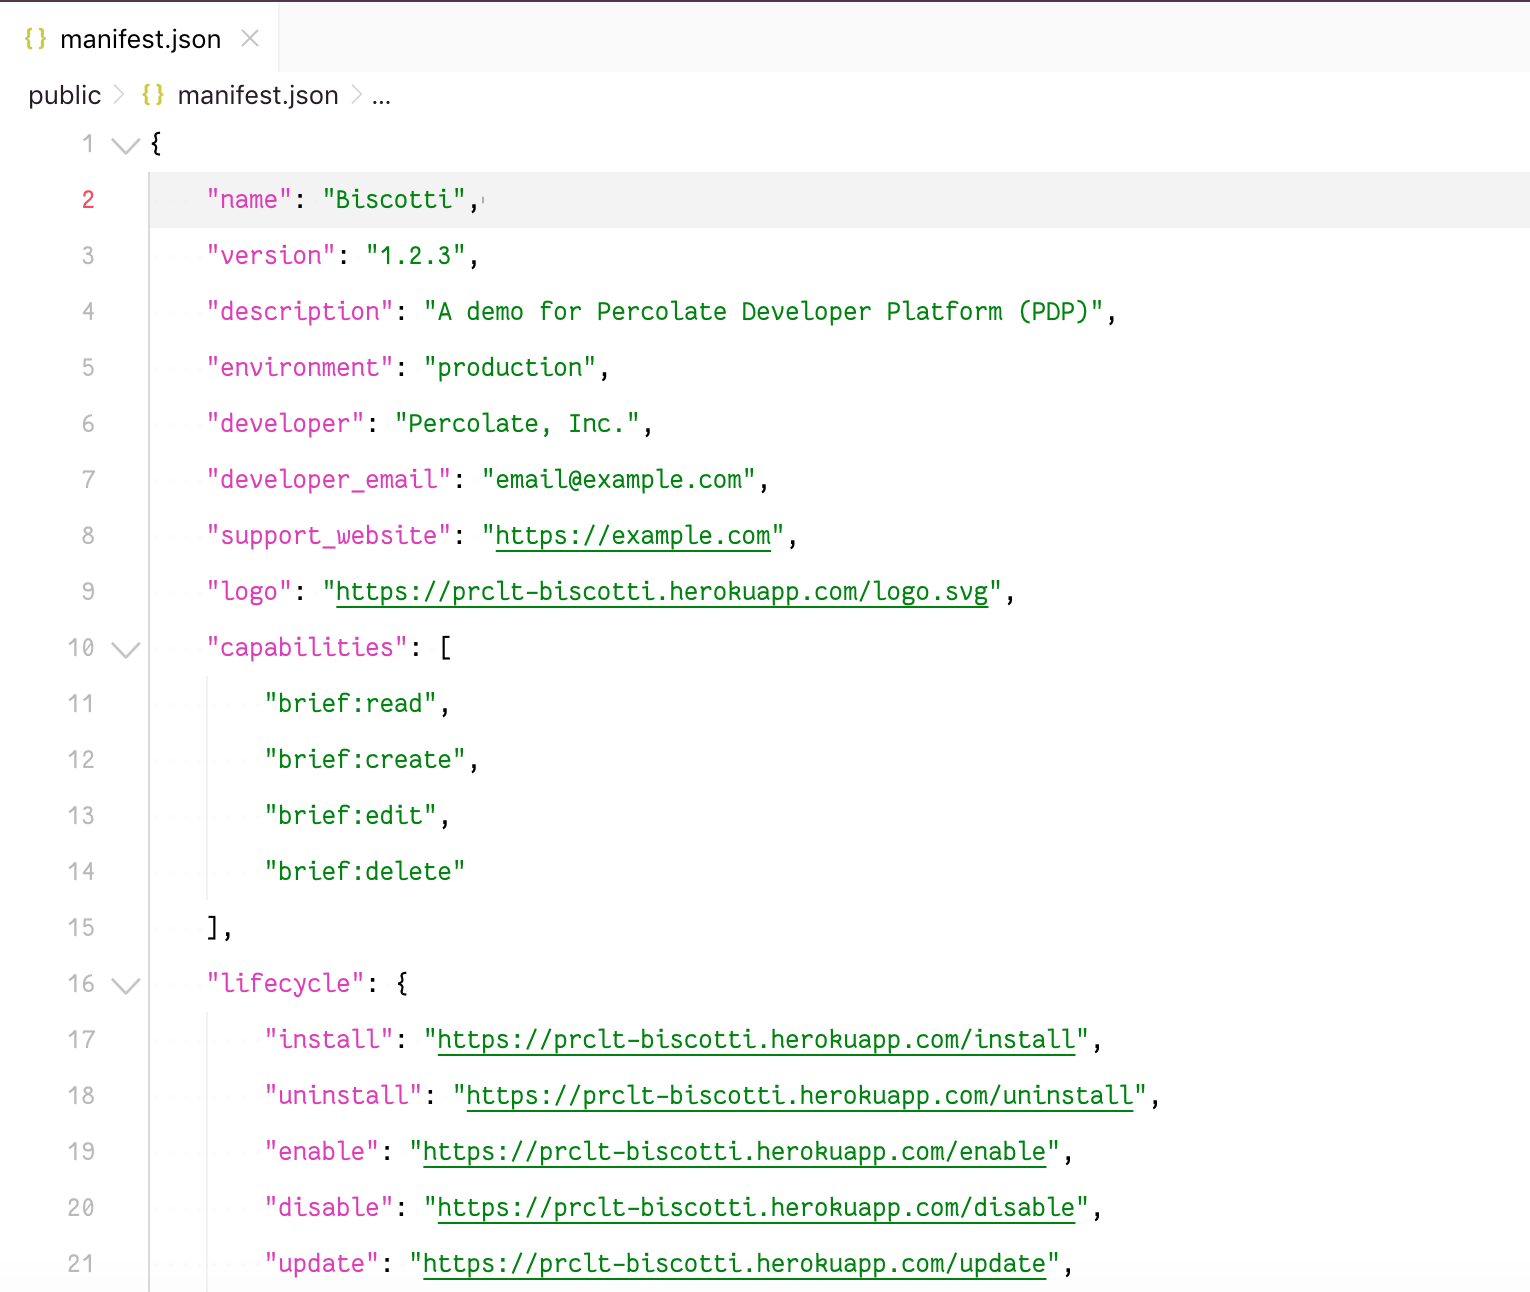
An application needs to be registered on Percolate to make it available for installation on a given tenant. This guide provides more information about registering an app. The app comes with a manifest.json file that describes it. The default Heroku URLs will need to be replaced with the ngrok URL we got in the previous section.
- Open manifest.json which is found within the public directory in the root of our repository in your text editor:

- Replace all references to https://prclt-biscotti.herokuapp.com with our ngrok URL https://494366fd.ngrok.io and save the file.
- On the Percolate app, go to Settings > Developer > App registration and click the New app button on the top right. Upload the manifest.json file within the modal that appears.
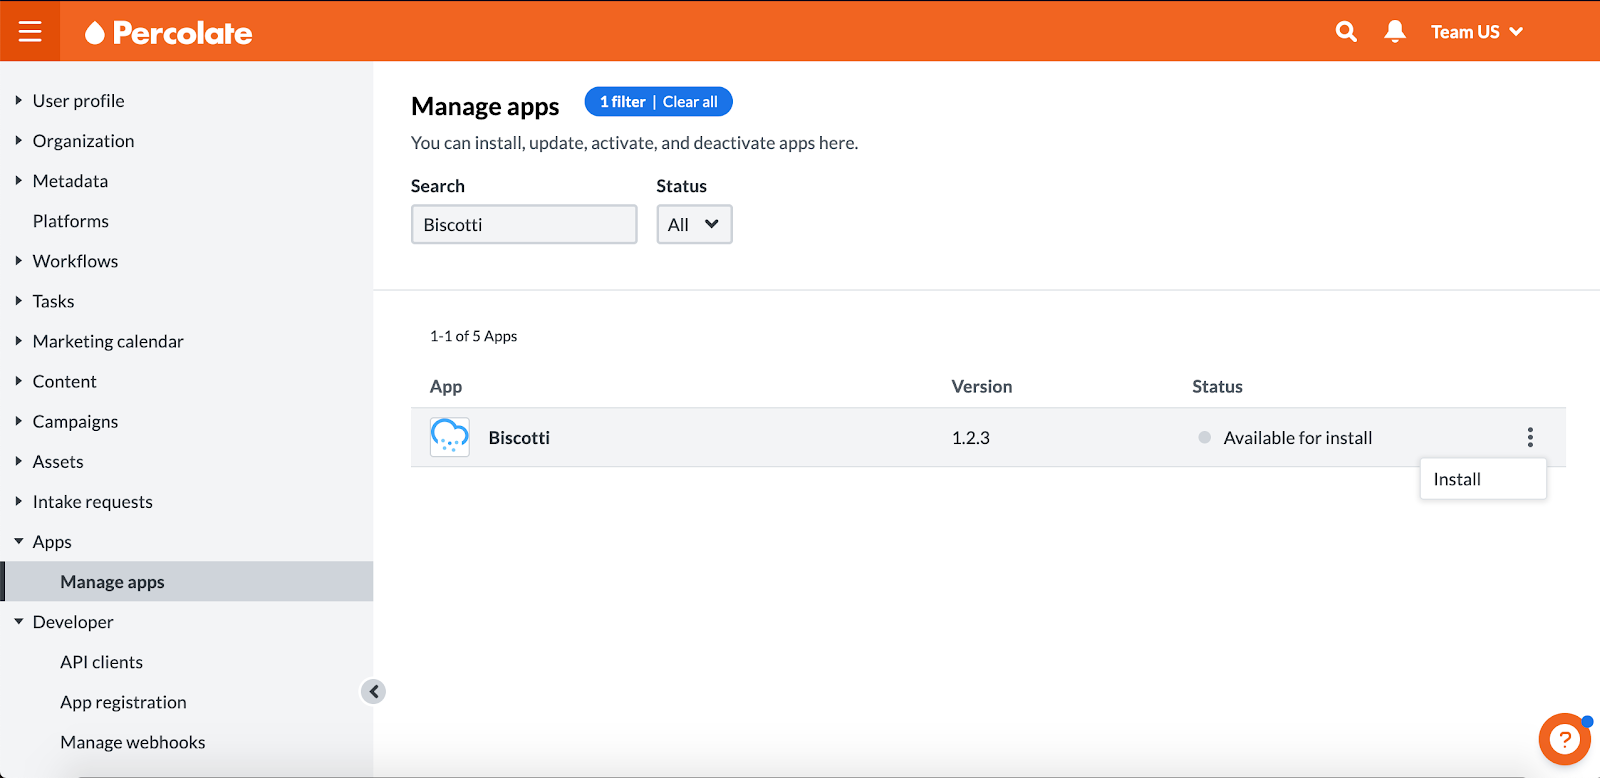
- Once registered, the app will be available for installation. To install it, go to Settings > Apps > Manage apps and find the Biscotti app within the list. Click Install on the vertical menu on the right of the app on the list view:

Upon installing the app, Percolate will make a POST request to our Hello World app /install endpoint with an access token in the payload:
[2019-10-31 23:58:31,766] INFO in app: Got lifecycle web request
Cannot validate request, no APP_SECRET environment variable defined
"install" endpoint called with data:
{'access_token': 'PSJIfaih92UH24n49JEa3_RsNafiojEz-3UIEAXYlj6zoajfWlYP_zjUvHoafjs3x', 'tenant_id': 'tenant:1, 'machine_user_id': 'user:150325', 'access_scopes': [{'is_hierarchical': True, 'scope_id': 'license:2'}], 'manifest_version': '1.2.3'}
127.0.0.1 - - [31/Oct/2019 23:58:31] "POST /install HTTP/1.1" 200 -
This lets us know the app’s URLs are being exposed to Percolate properly.
Note: The “Cannot validate request” message appears because we haven’t yet supplied the app with its app secret, generated by Percolate. We’ll handle that in the next section.
UI Extensions
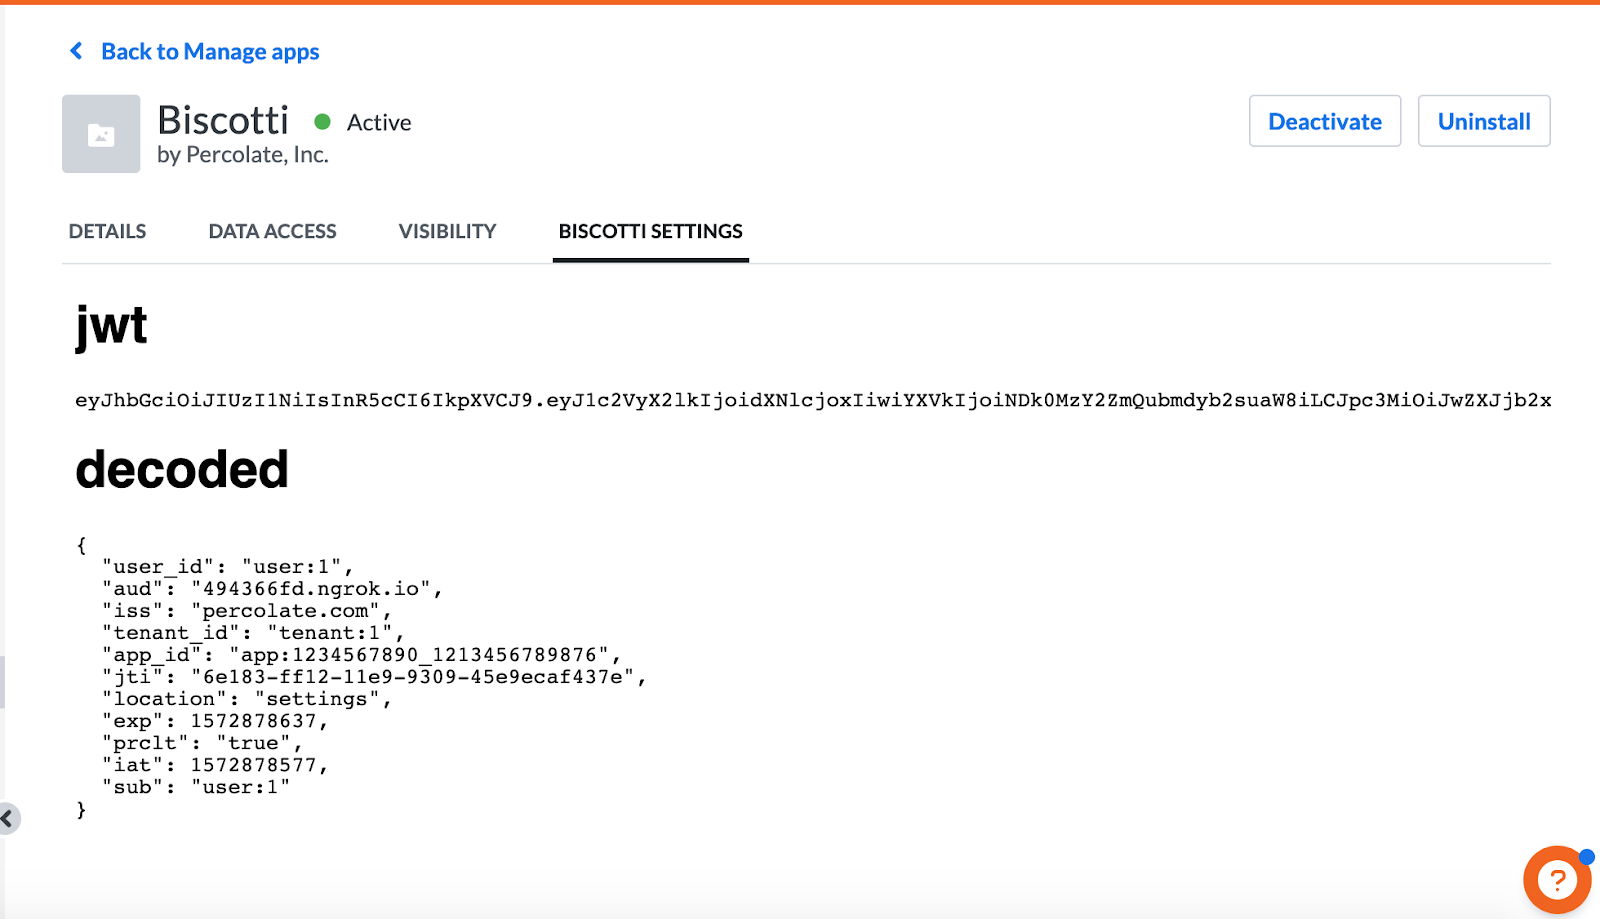
Additionally, the app manifest.json comes with UI extensions. We can see an example of this on the settings page for our app, there’ll be a Biscotti Settings tab.

When this tab is clicked, Percolate makes a GET request to your server with a JSON payload in encoded as a JSON Web Token (JWT) that can be decoded to get extra context. The reason for encoding the payload as a JWT is so that your app can ensure the source and integrity of the data being received.
Your app should respond with the markup you want rendered on Percolate’s UI.
For the Biscotti app, we see the response from our server “No app secret defined”:

This is because the APP_SECRET environment variable is undefined when starting the server. You can retrieve the app secret by navigating to Settings > Developer > App registration > Biscotti and clicking the “Show app secret” button. This guide provides more detail.
Once you retrieve it, stop the running server and run the following to set the environment variable:
$ export APP_SECRET=<app-secret-value>
Start the server again:
$ python app.py
The JWT token sent in requests will now be verified successfully:

Additionally, lifecycle callback requests should no longer display the “Cannot validate request” log message.
The Biscotti app comes with several more lifecycle and UI extension endpoints all documented within the README.md document of the repository. The rest of the documentation on Percolate app integrations can be found [here](link to Percolate integrations).
Updated over 6 years ago
